

Article written using Adobe Photoshop Elements 9 with Windows 7
I love making my layouts look as realistic as possible. I love it when people have to ask, “Is this a photo of a paper scrapbooking layout or is it all digital?” One of my favorite tools that help make things look touchably realistic are ScrapSimple products that create a “lifted photo” look. They give my pages a feeling of depth and texture that instantly boosts the realism factor. But, if not used correctly, they can create a sense of something being “off” instead. I’ve got three tips to help you use them on your pages.
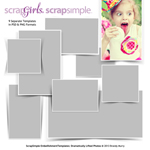
I’m using ScrapSimple Embellishment Templates: Dramatically Lifted Photos by Brandy Murry for my examples.
First, be careful how you place lifted photos, especially in clusters.
Think about how they would look if you were physically laying out pictures. Don’t overlap the parts that are supposed to look lifted with other frames that are supposed to look flat. To increase the lifted look, layer things under not over.
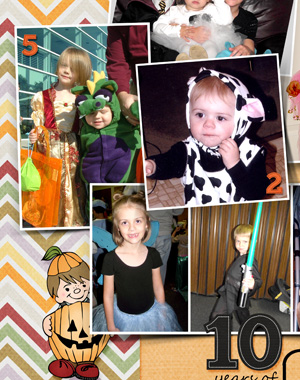
Place a flower or a staple in these areas to make it look like the frame is being held down in that spot, while lifting away from the page in other areas.

Third, pay attention to the color of the shadows.
In real life, shadows aren’t always black or grey. They are actually a darker shade of whatever they are cast on. If a pink flower casts a shadow onto an orange paper, the flower’s shadow will be a dark shade of orange. Tweaking the shadow colors on your layouts will make them look more realistic. I prefer to use a product like ScrapSimple Tools – Styles: Basic Shadows 6501 by Sarah Batdorf for most of my layouts, but the black premade shadows included in lifted photo products are easy to recolor.
Here is a side-by-side comparison of the basic black shadow included in Brandy’s ScrapSimple Embellishment Templates: Dramatically Lifted Photos set on the left and the recolored version on the right.

Here are the basic steps to recolor the shadows from lifted photo products (and this will actually work to recolor just about anything!):
Step 1: Select the color of the background using the Eyedropper Tool.
Step 2: Make the Shadow Layer that you want to recolor active in the Layers Palette.
Step 3: Click Enhance > Adjust Color > Adjust Hue/Saturation (or use the shortcut Ctrl+U). When the Hue/Saturation window opens, put a check in the Colorize box in the lower right-hand corner. This sets the Hue slider, so don’t mess with it even if the color doesn’t look right at first. It does not set the Saturation or the Lightness sliders. Those have to be adjusted manually. Because you are recoloring a black shadow, you will need to move the Lightness slider to the right before you’ll see any changes. Play with both the Saturation and Lightness sliders until you get the look you want.

Click “OK” and you are finished recoloring the shadow!
I look forward to seeing your layouts featuring lifted photos and realistic shadows! Don’t forget to post them in the Scrap Girls Gallery!


Digital scrapbooking products used:
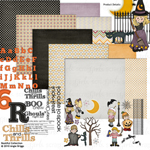

Commercial license versions of ScrapSimple Tools – Styles: Basic Shadows 6501 are also available.


